Getting Started
Overview
This section provides an overview of core Dataspace features, including signing up, logging in, and managing your profile and settings. Users can create an account from an invitation email, sign in via a browser, review and customize profile details, and use predefined keyboard shortcuts for faster navigation.Additionally, users can import data using supported CSV or XLSX spreadsheets and monitor the import status.
Background
Data space brings a brand-new user experience in how users interact with data, offering in-depth customization for any domain and ease of operation from small teams to expert-level enterprise, while retaining the current data modelling, domain-specific template customization, entity relationships and secured data sharing architecture.
Core Objectives
- Build a simpler and more intuitive data experience.
- Provide multiple visualizations.
- Handle data as a flow rather than a pile.
Current UI vs Data Space
| Current Design | Data Space |
|---|---|
| Static, pre-designed structure. | Dynamic environment that can be customized as required. |
| Static action menu options. | Dynamic action menu options based on the specific context. |
| List of entities is displayed in the hamburger menu. | Available entities are displayed as tiles in the Explore option. |
| Details of a specific entity are displayed on an Entity Details page. | Details of a specific entity are displayed through the Entity Explorer visualization. |
| A customized filtered view cannot be saved or pinned for quick access. | Frequently accessed filtered views can be set up as a Space for quick access. |
Sign Up for Data space
To create a user account, complete the following steps:
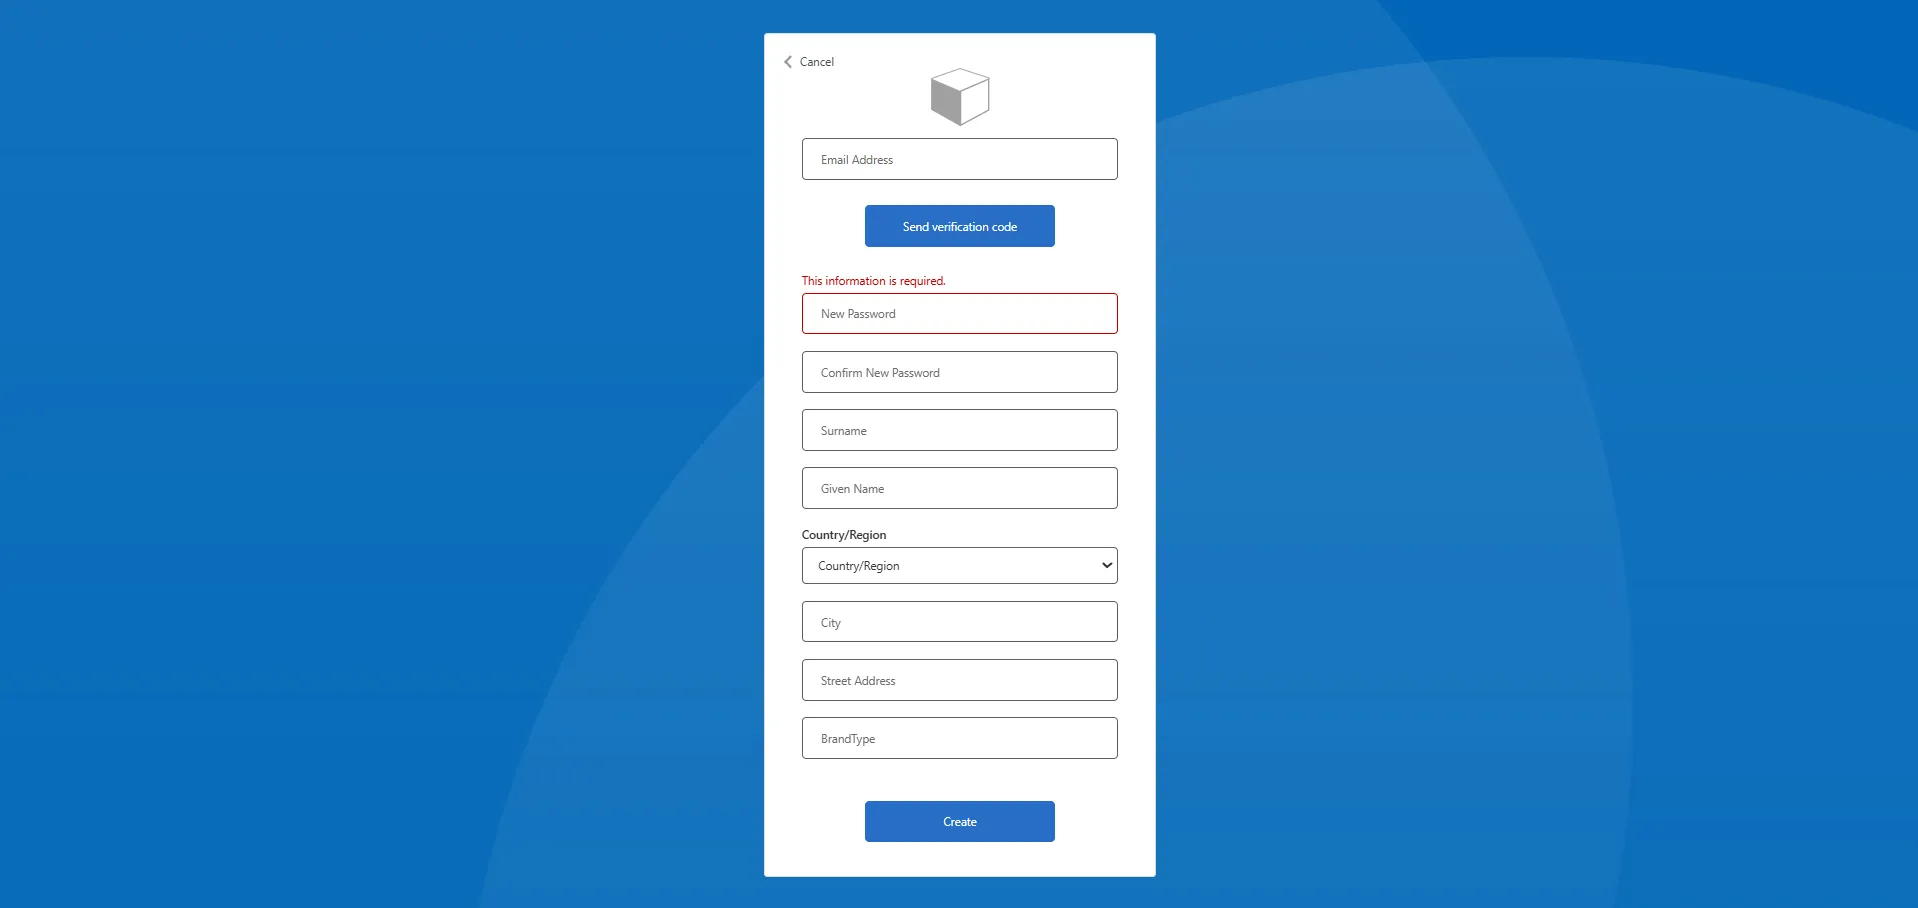
- In Outlook, select the invitation email sent from an existing user.
- In the email, click the invitation link.
- On the login page, enter your credentials in the Email Address field.
- Click Send verification code. A verification code will be sent to your email address.
- Enter the code you received and click Verify code.
- Create a strong password:
- New Password– Enter a strong password.
- Confirm New Password – Re-enter your new password.
- Enter your profile information such as Given Name, Surname, Address and Brand Type.
- Click Create.
You have successfully created a user account in data space. The default landing page will be the predefined space set by your administrator.
First Time Login
To access your Dataspace instance, complete the following steps:
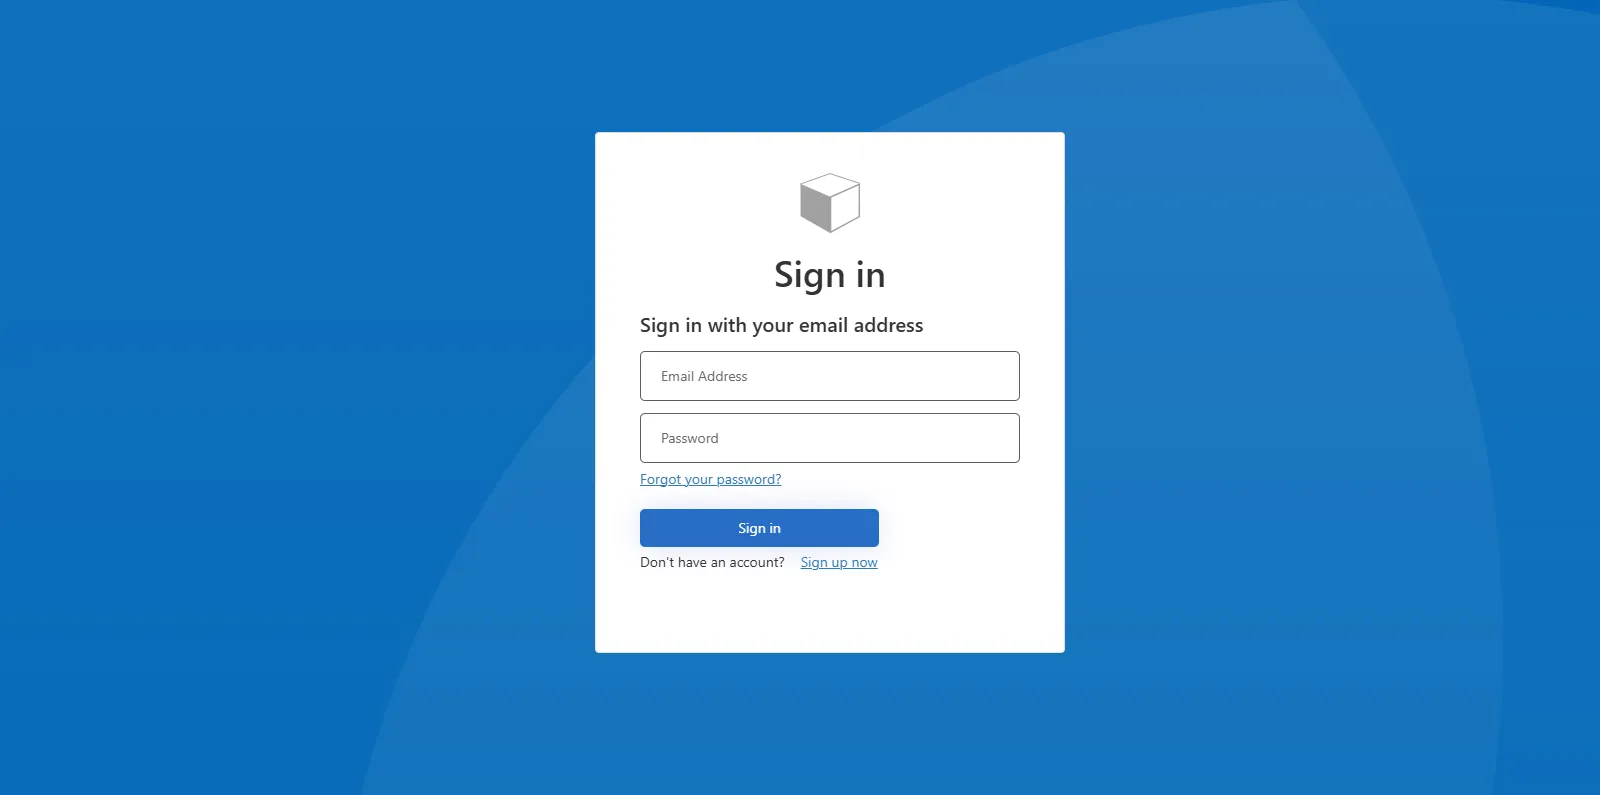
- Open your web browser. Google Chrome is recommended.
- Go to the Dataspace instance via the provided link.
- You will be redirected to the login page.
- Enter your credentials in the Email Address and Password fields.
- Click Sign In.
- Explore will be displayed as the default landing space.
Note: An admin user can configure default landing space based on a user role.
Access Your Profile
Profile displays user information such as username, ID, and organization along with Account setting options.
Sections of Profile
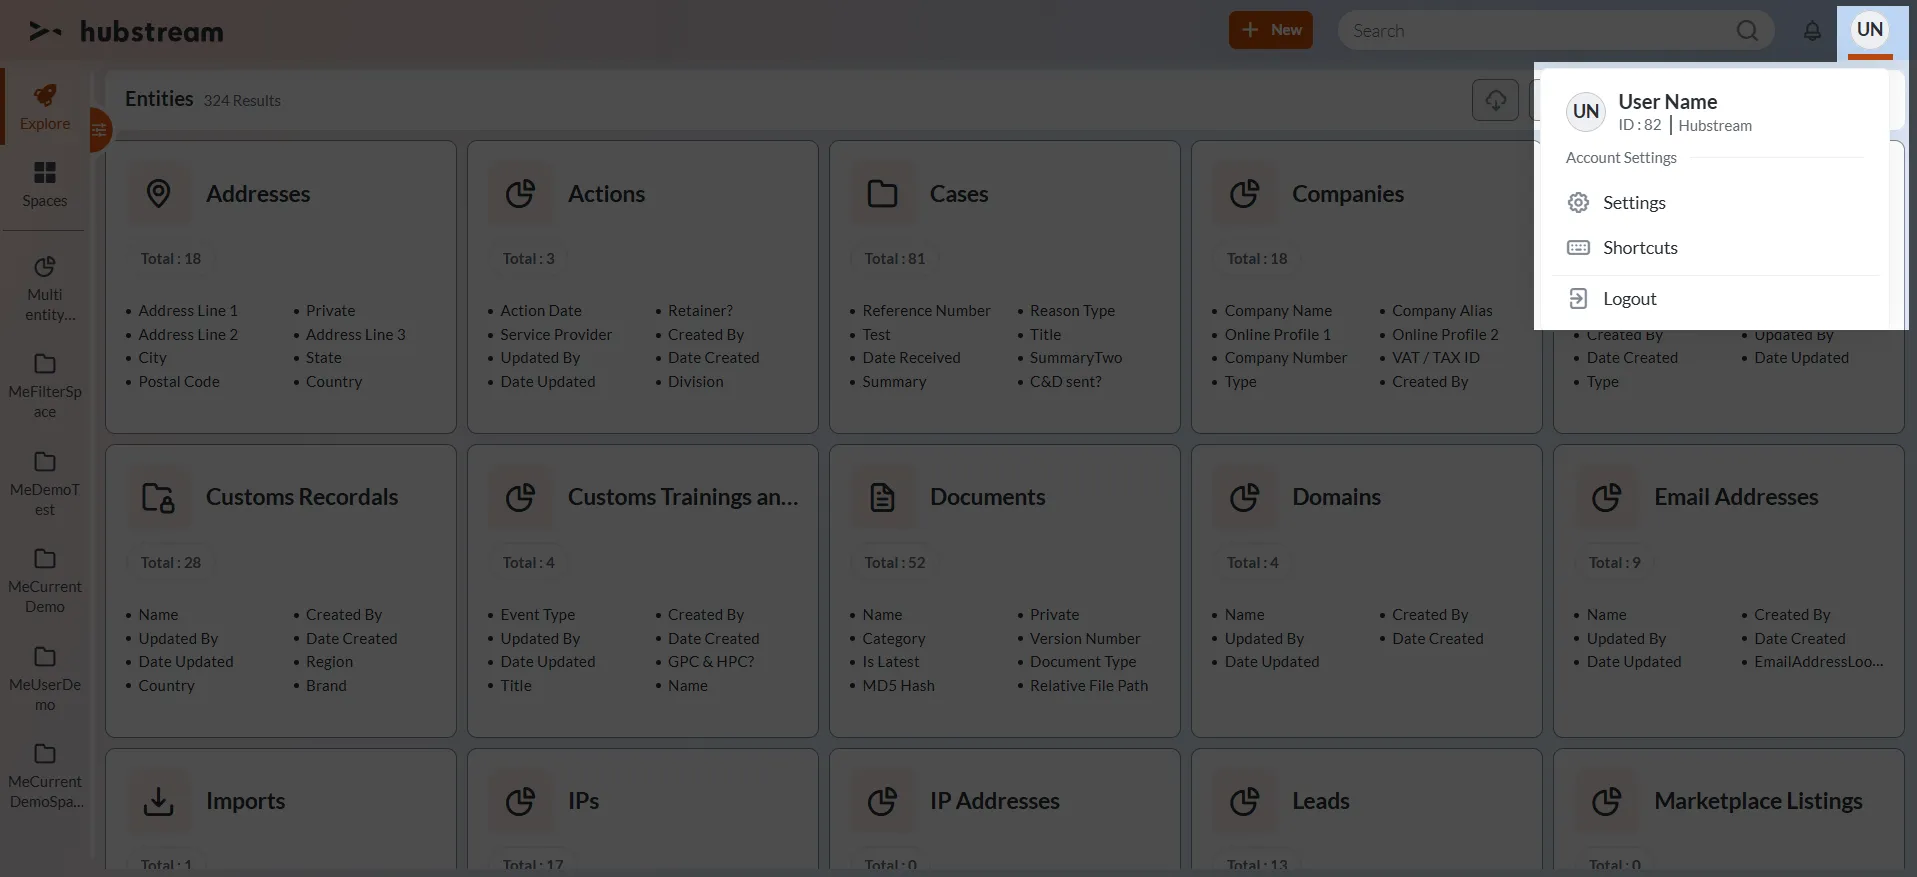
- Profile icon – Displays the profile picture (if set) or user initials badge.
- User information – Displays the following user information.
- Username
- ID
- Organization
- Settings – Allows you to view general settings and modify profile icon.
- Shortcuts – Allows you to use a predefined list of keyboard shortcuts within dataspace.
- Logout- Allows you to log out of the system.
Access the Settings
Follow the steps below to view the general settings information:
- Log in to the Dataspace instance.
- Click the profile badge in the top-right corner.
- Click Settings. You will be redirected to the Settings page.
Sections of Settings page
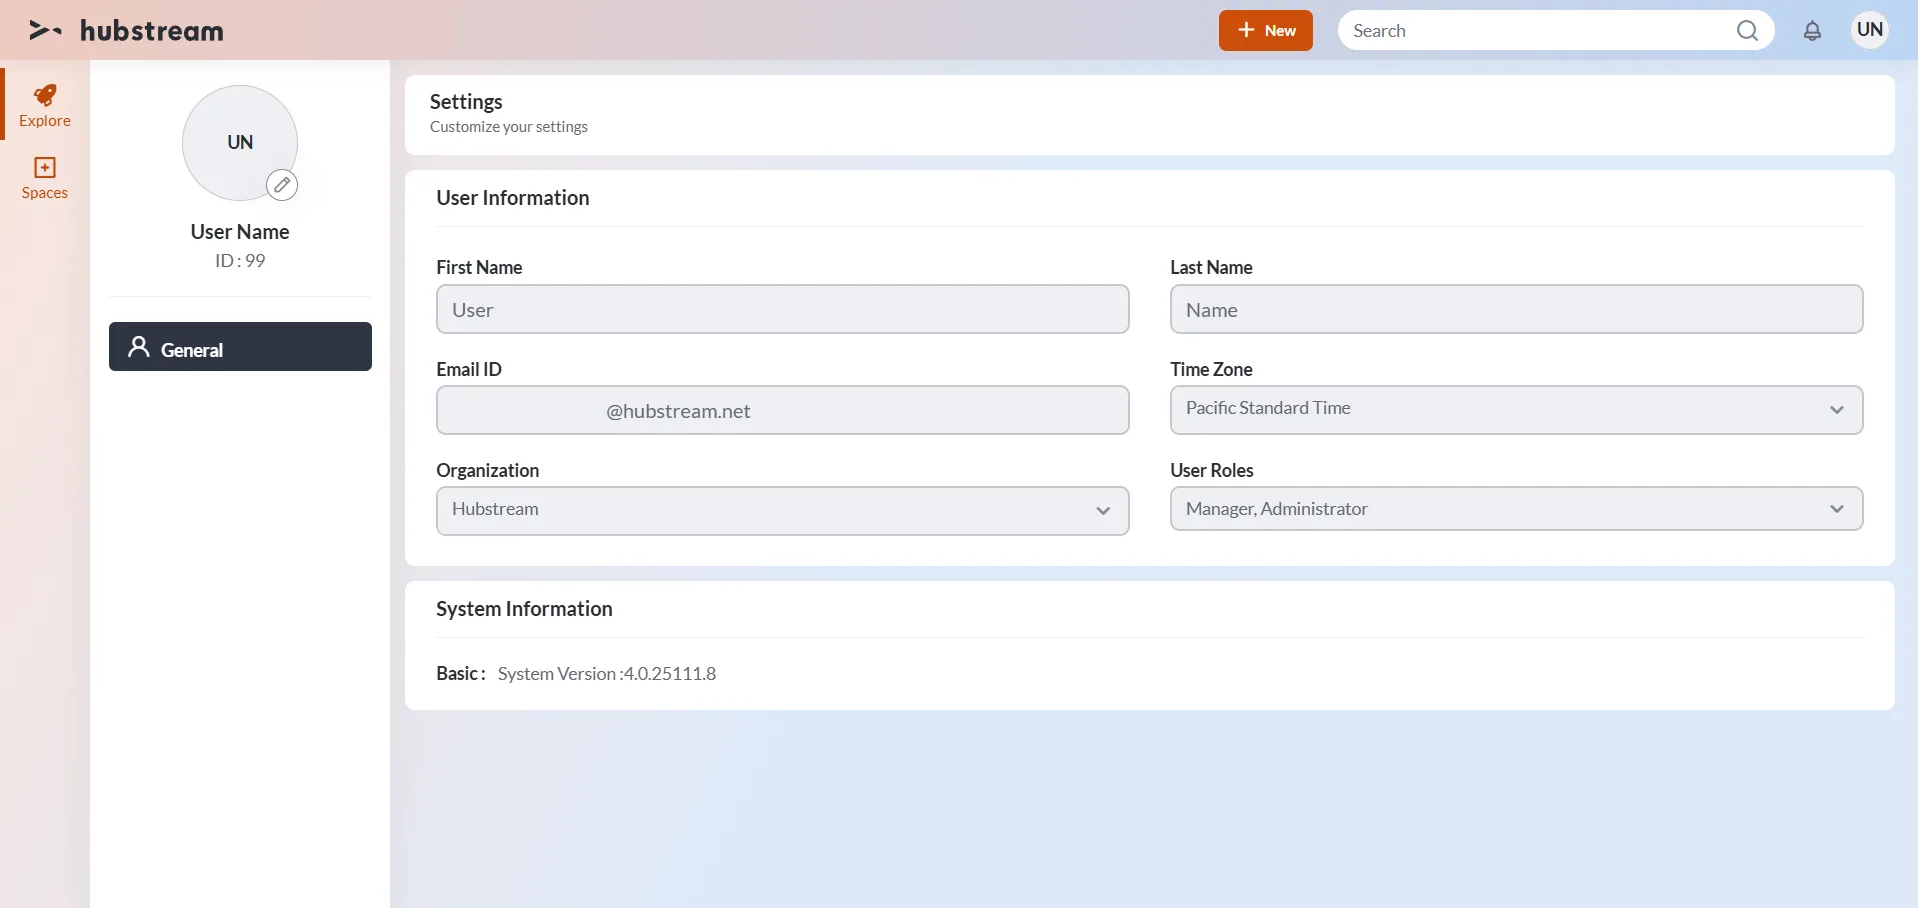
- Left Pane
- Consists of the Profile badge with an edit icon, Username, and ID.
- User Information – Consists of the following information:
- First Name
- Last Name
- Email ID
- Timezone
- Organization
- User roles
- System Information – Consists of the System version number.
Customize Your Settings
Change your Profile Picture
Follow the steps below to modify your profile picture:
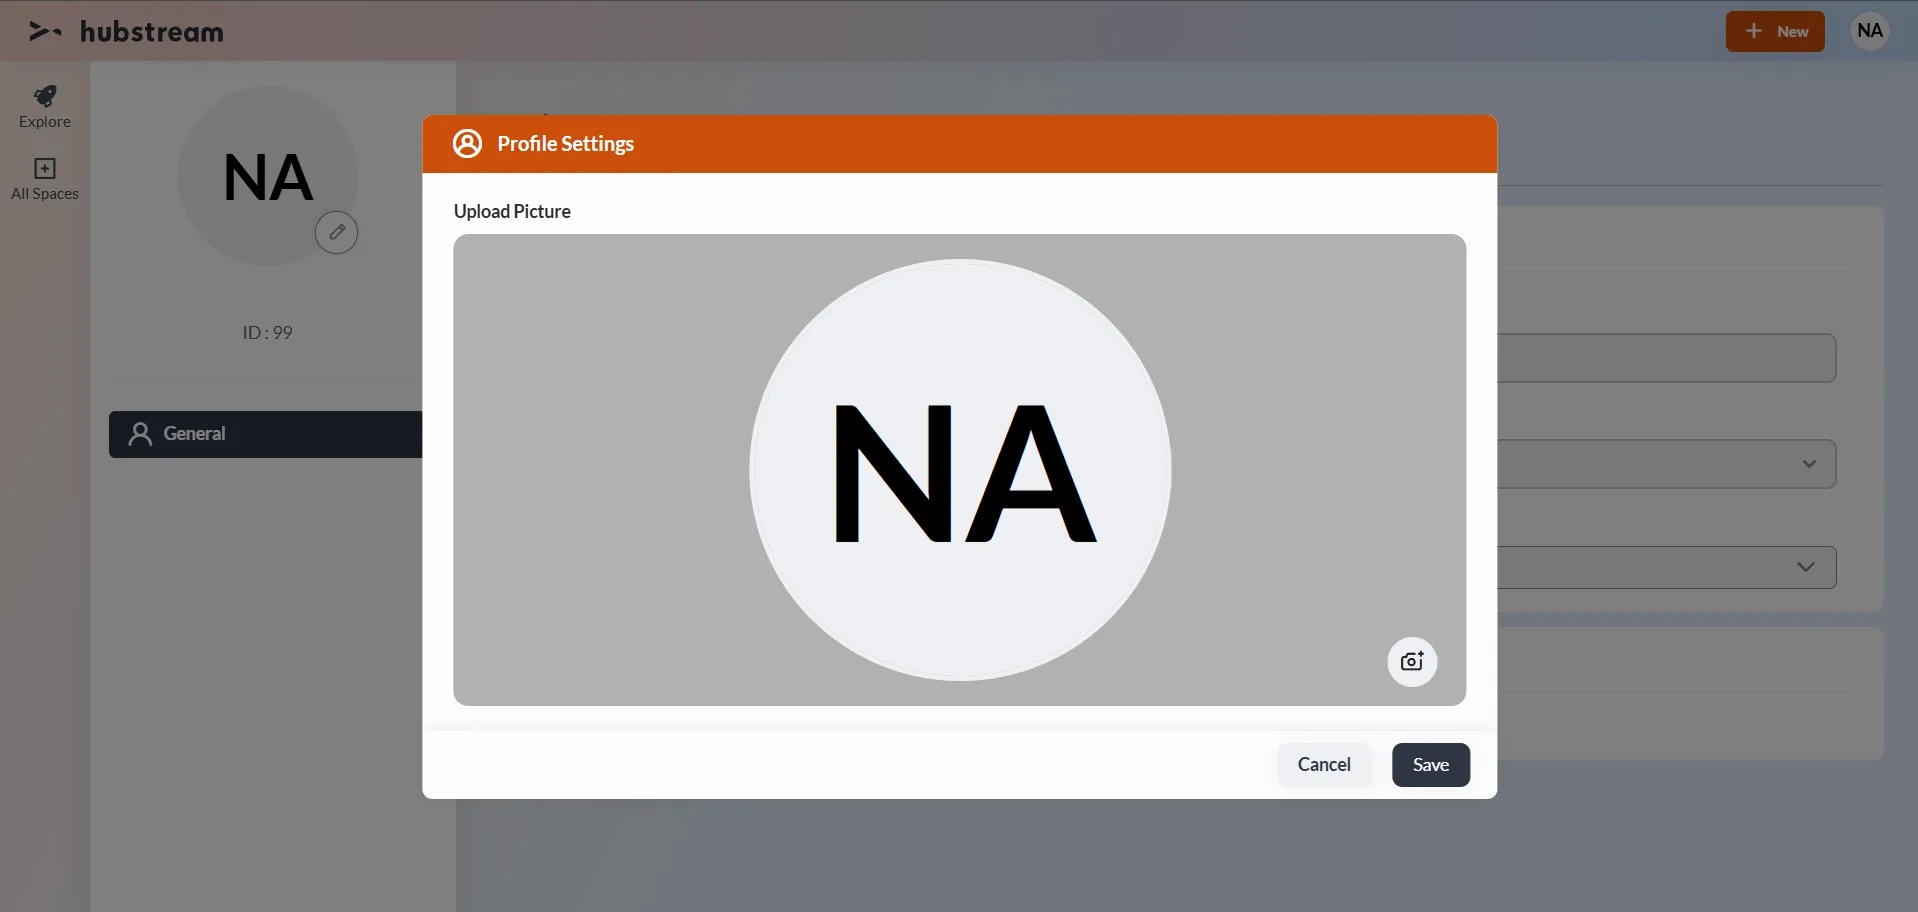
- Navigate to the Settings Page.
- Click edit near your profile badge in the left pane.
- Click add image icon.
- Choose the desired image and click save.
- Once set, your profile picture will replace the initials badge.
Log Out
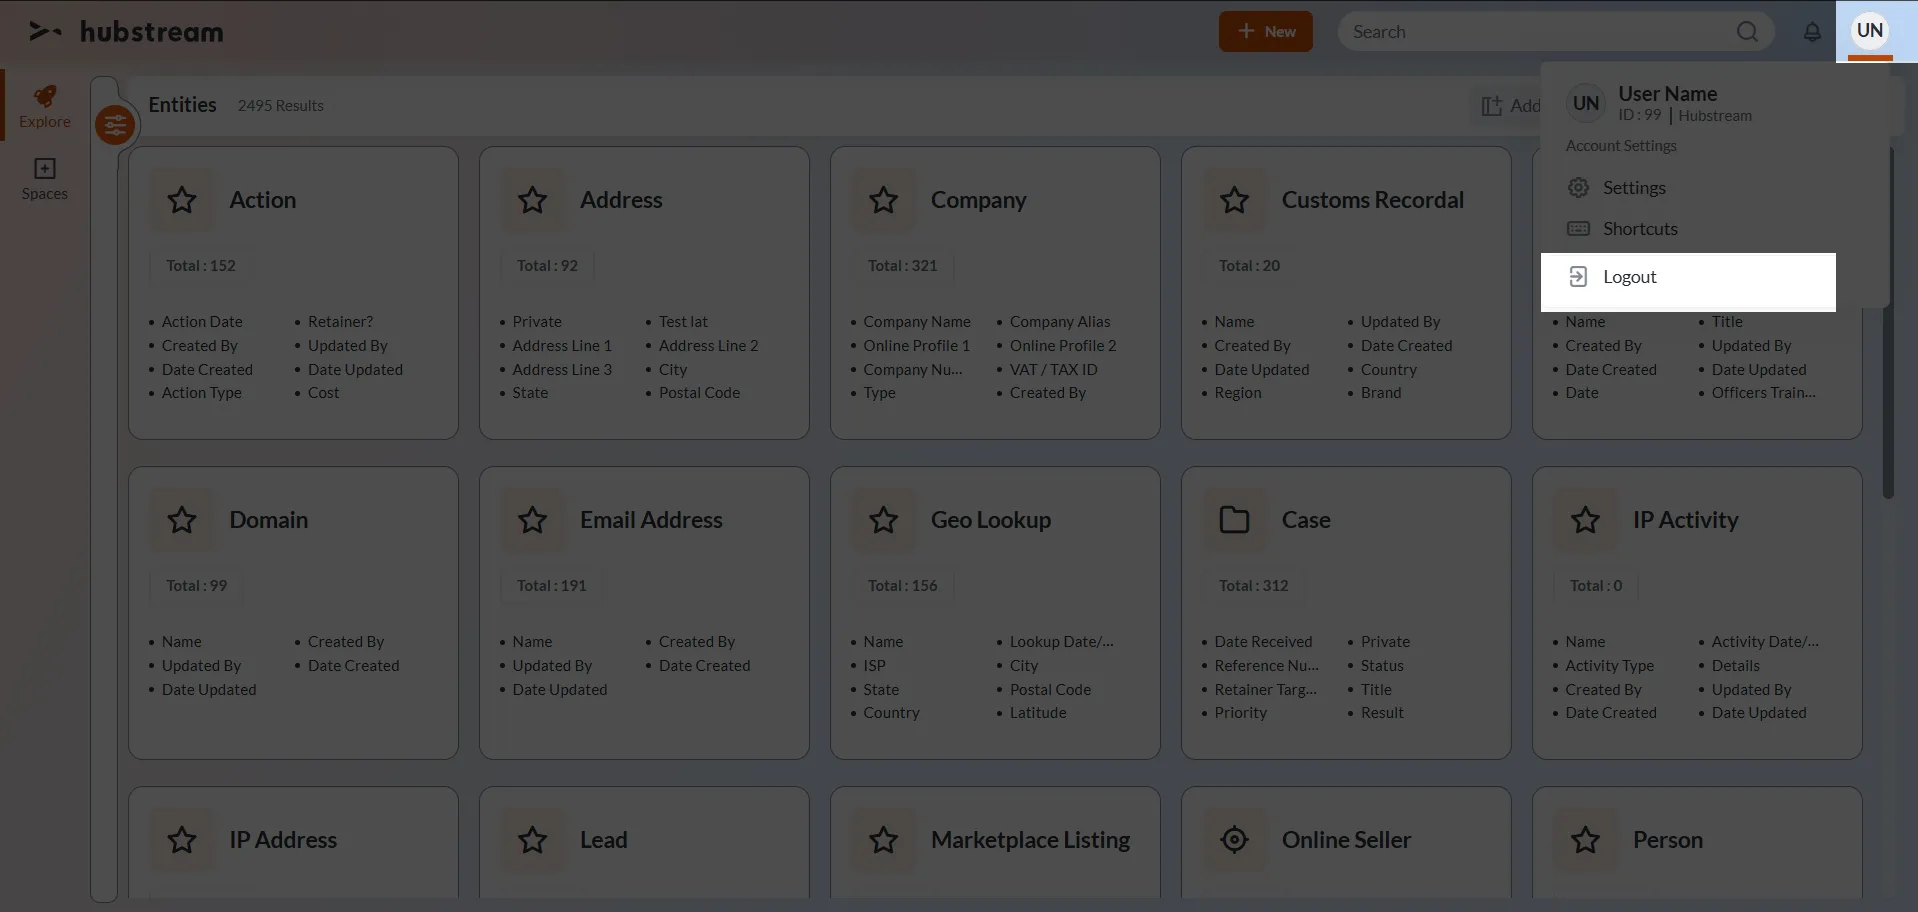
Follow the steps below to logout of the data space instance:
- Click the profile badge in the top-right corner.
- Click Logout. You will be redirected to the Sign In page.
Note: If multiple tabs are opened, logging out in one tab automatically logs out all other tabs with the message: “Your session has been logged out from another tab. Please log in to continue.”
Session Time Out
You will be logged out of the system automatically If there is no activity in a tab for the configured time interval. A session timeout pop-up appears displaying: “Your session has been automatically timed out due to inactivity. Click OK to reload.”
Note: The time-out interval is set for 2 minutes.
Session time-out scenarios
- If there is no activity for 1minute: a. A warning pop-up is displayed to save your changes.
- If there is no activity for more than 2minutes: a. You are logged out of the system with a session timeout pop-up.
- While working with multiple tabs, if a tab remains inactive for a specified period, its session will expire. However, you need not log in again, as the session remains active in other tabs.
Keyboard Shortcuts
You can use a predefined list of keyboard shortcuts within dataspace. To view the available list of keyboard shortcuts, follow the steps below:
- Log in to the Dataspace instance.
- Click the profile badge in the top-right corner.
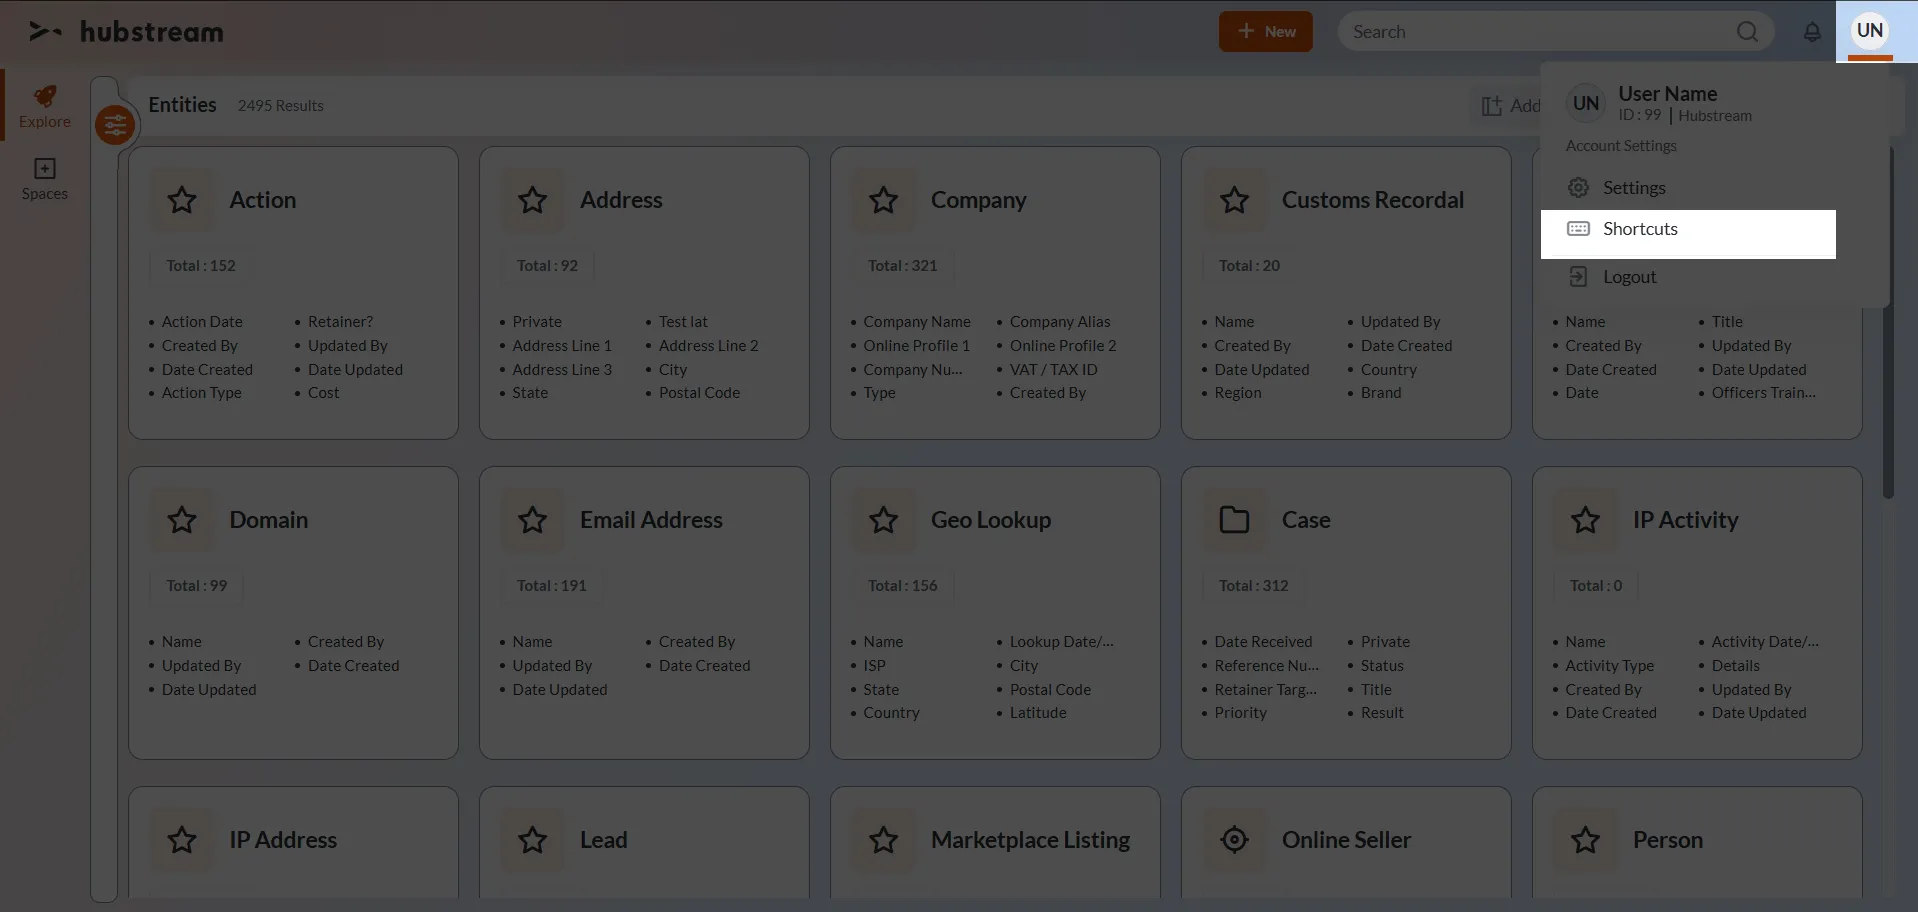
- Click Shortcuts.
- A popup form will appear with the list of available keyboard shortcuts.
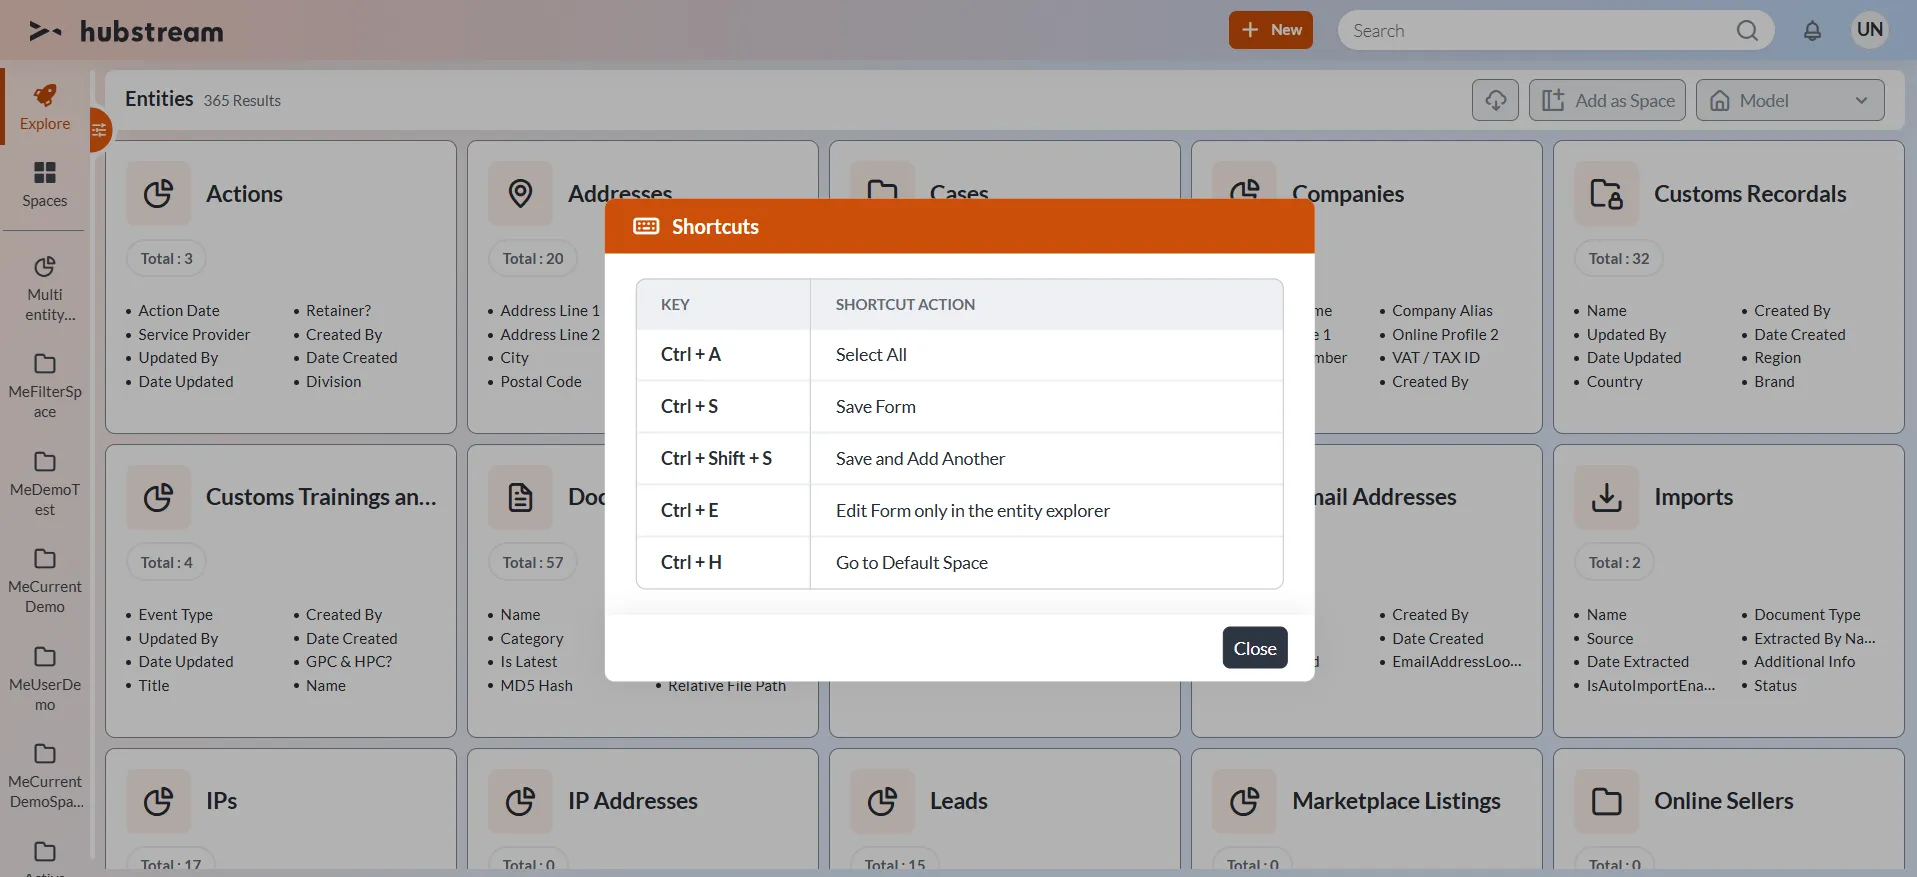
Shortcut Functionalities
- Ctrl + A
- Selects all entries wherever the “Select All” button is available.
- In a form field, selects all text within that field.
- Ctrl + S
- Saves the current entry and automatically closes the form.
- Ctrl + Shift + S
- Saves the current entry and opens a new form to add another entry.
- Applicable only in the new entry form.
- Ctrl + E
- Opens the edit form when viewing a single entry in the Entity Explorer visualization.
- Ctrl + H
- Navigates to the default space.
- The default space is determined by the DefaultSpace model settings.
Import Spreadsheet
You can import data into the system by uploading a spreadsheet via Import. Follow the steps below:
- Log in to the Dataspace instance.
- Click + New in the top-right corner. A list of options will be displayed.
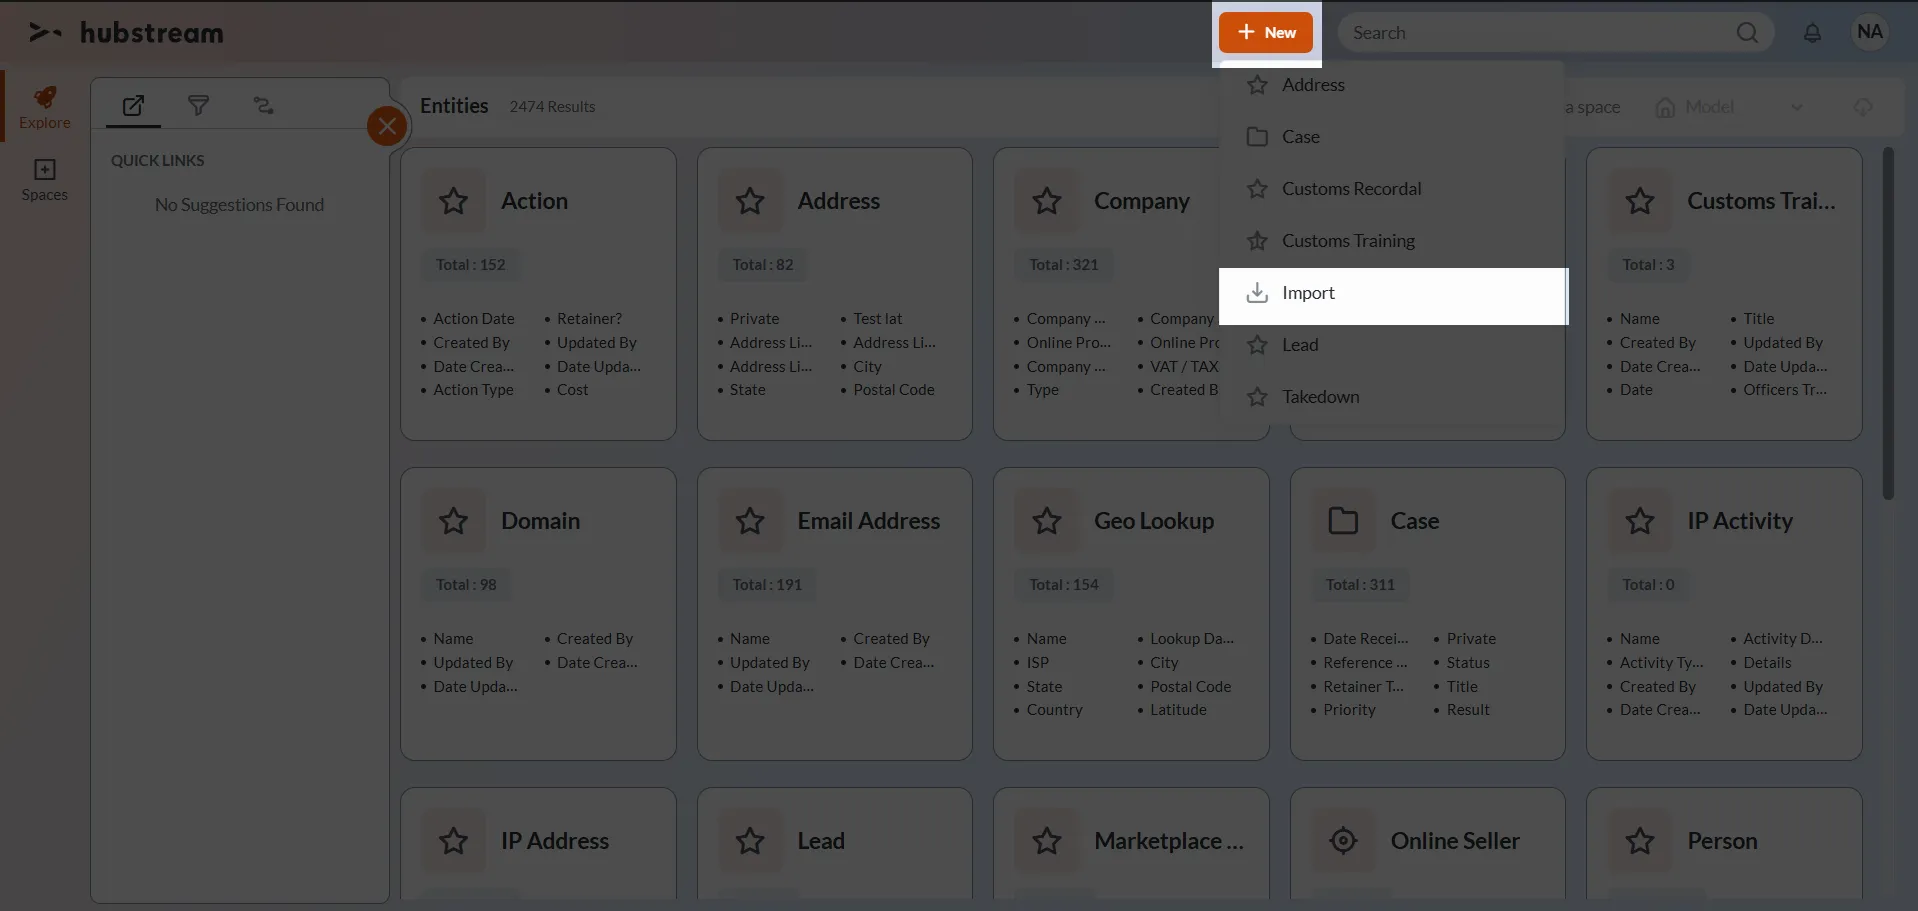
- Select Import.
- Add Import popup form will appear.
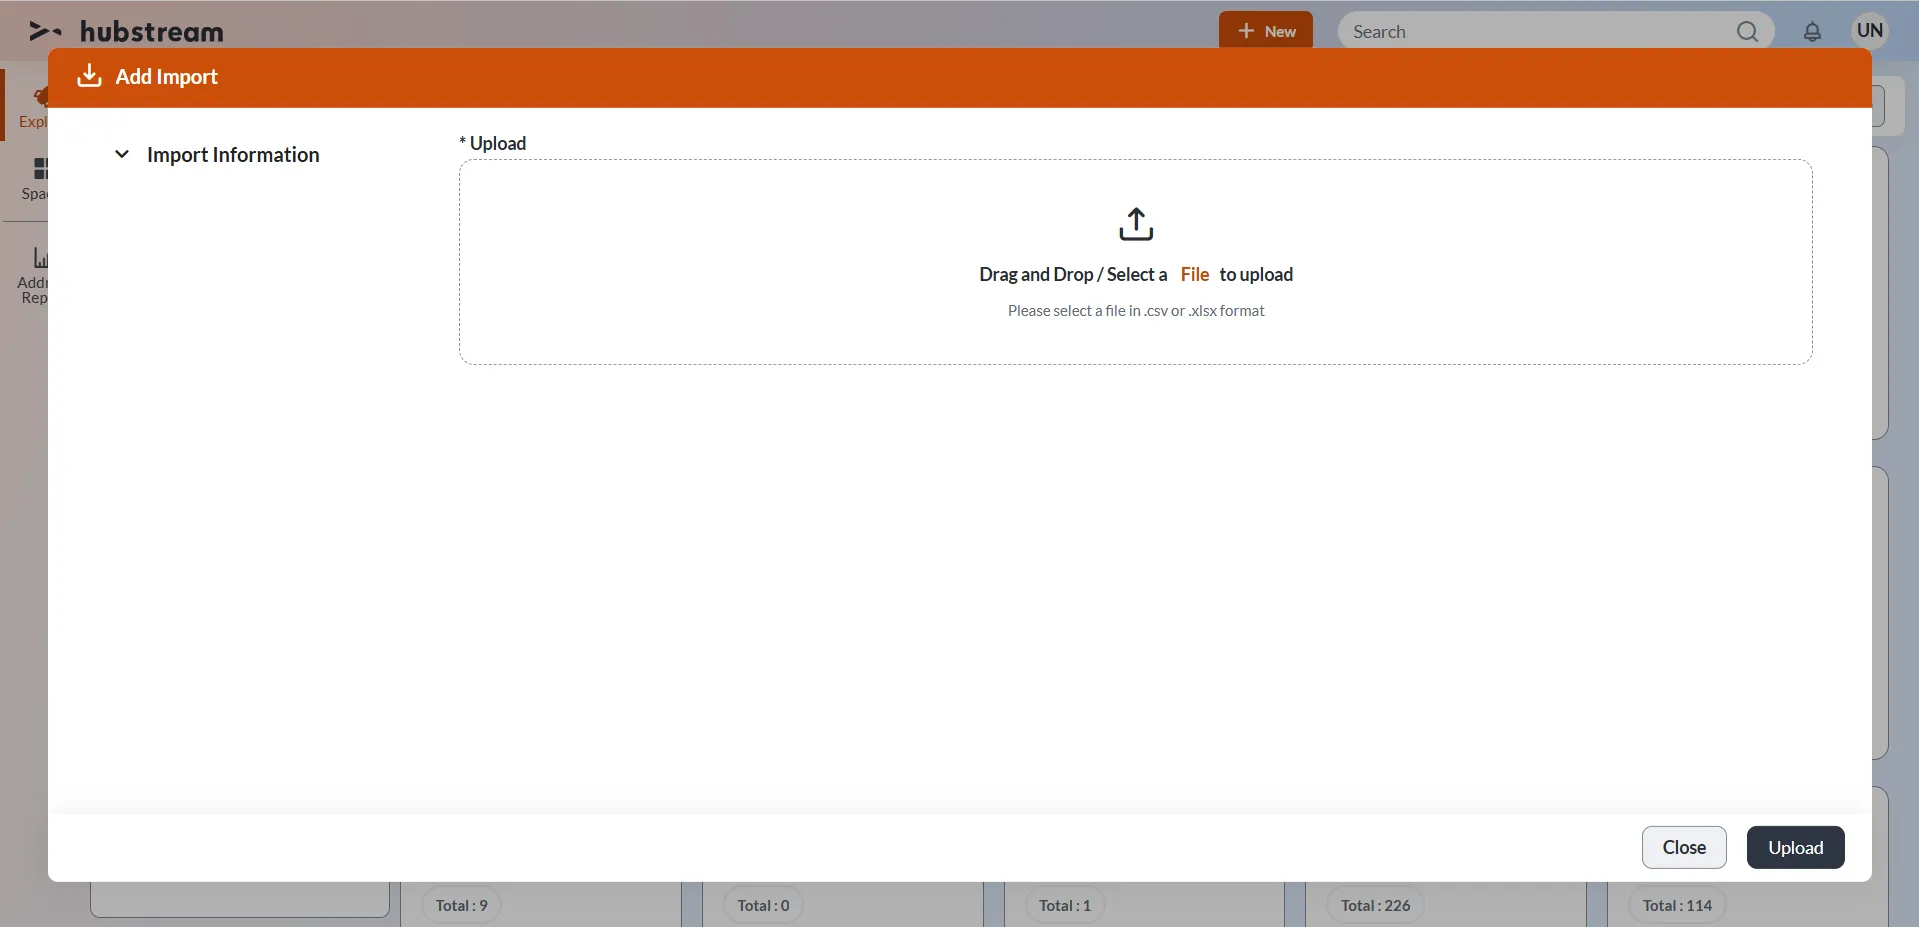
- Drag and Drop or Select a file to upload.
- Click Upload.
- A banner Uploading in progress is displayed. Once the upload is successful, you will be redirected to the Import Spreadsheet Details page where the import status will be displayed in the infographics section.
For the first time import:
- The import status will change to Import mapping. Import mapping form will appear.
- Click Start Import. Refresh the status with interval.
- Once, the import status shows complete, the upload is successful.
Refer to the Import section for more information.
Note: Only .csv or .xlsx files are supported. If a user tries to upload an unsupported file type, a validation message appears “<filetype> is not a supported file type.”