Overview
A Pagescape Rule controls the visualizations that are available for an entity type within the user interface. Visualizations include Grid, Graph, Model, Text, Entity Explorer, and more.
A Pagescape type rule is defined to determine which visualizations should be available for an entity type, and how each visualization is presented in the Visualization Switcher menu, such as its caption, thumbnail image, icon, tooltip, and the order in which it appears.
This allows the admin to define only the useful visualizations to make available instead of all visualizations, because some entity types do not require certain visualizations.
Create a Pagescape Rule
To create a pagescape rule, follow these steps:
- Navigate to the Entity Types page.
- Click the View Rules hyperlink of a desired entity type (for example, Case). The Rules list page for that entity is displayed.
- Click the plus (+) icon in the top right corner of the screen.
- A New Rule form appears. The form consists of two sections. When you select a rule type, further sections based on the selected rule type appear.
- Complete the fields from the sections below.
Rule Info
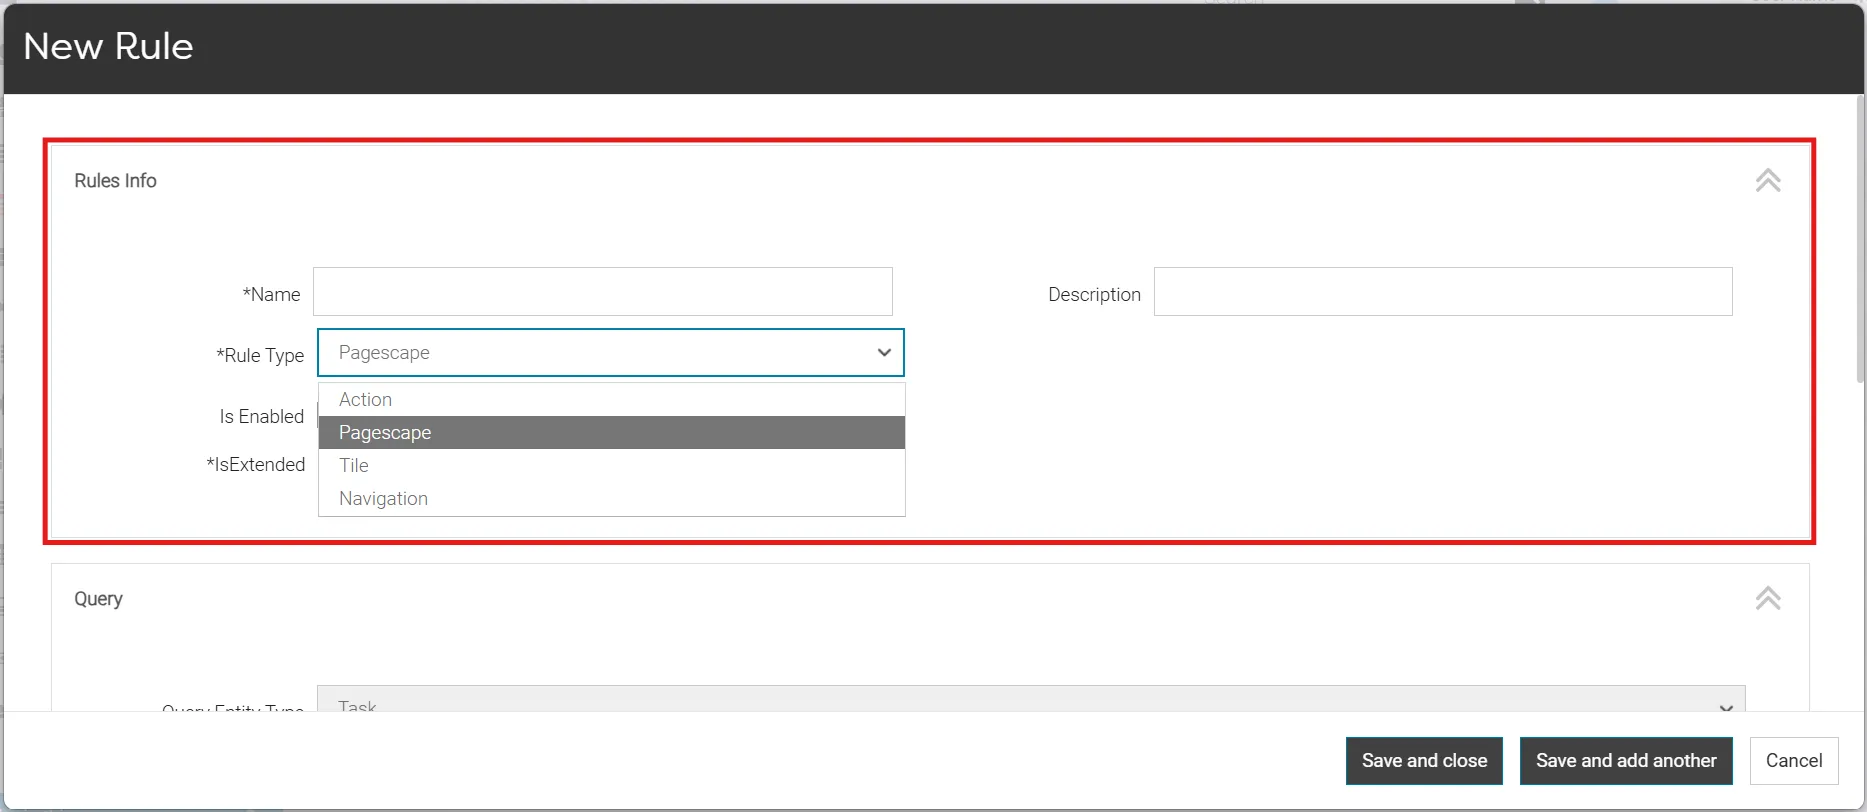
- Enter a Name for the rule.
- Enter Description information.
- Choose Pagescape as Rule Type from the dropdown.
- The Is Enabled checkbox is selected by default.
Note: If the checkbox is cleared before saving, the rule is created in a disabled state and is not executed or displayed in the platform until it is enabled.
- The Is Extended checkbox is selected by default and cannot be unchecked.
Query
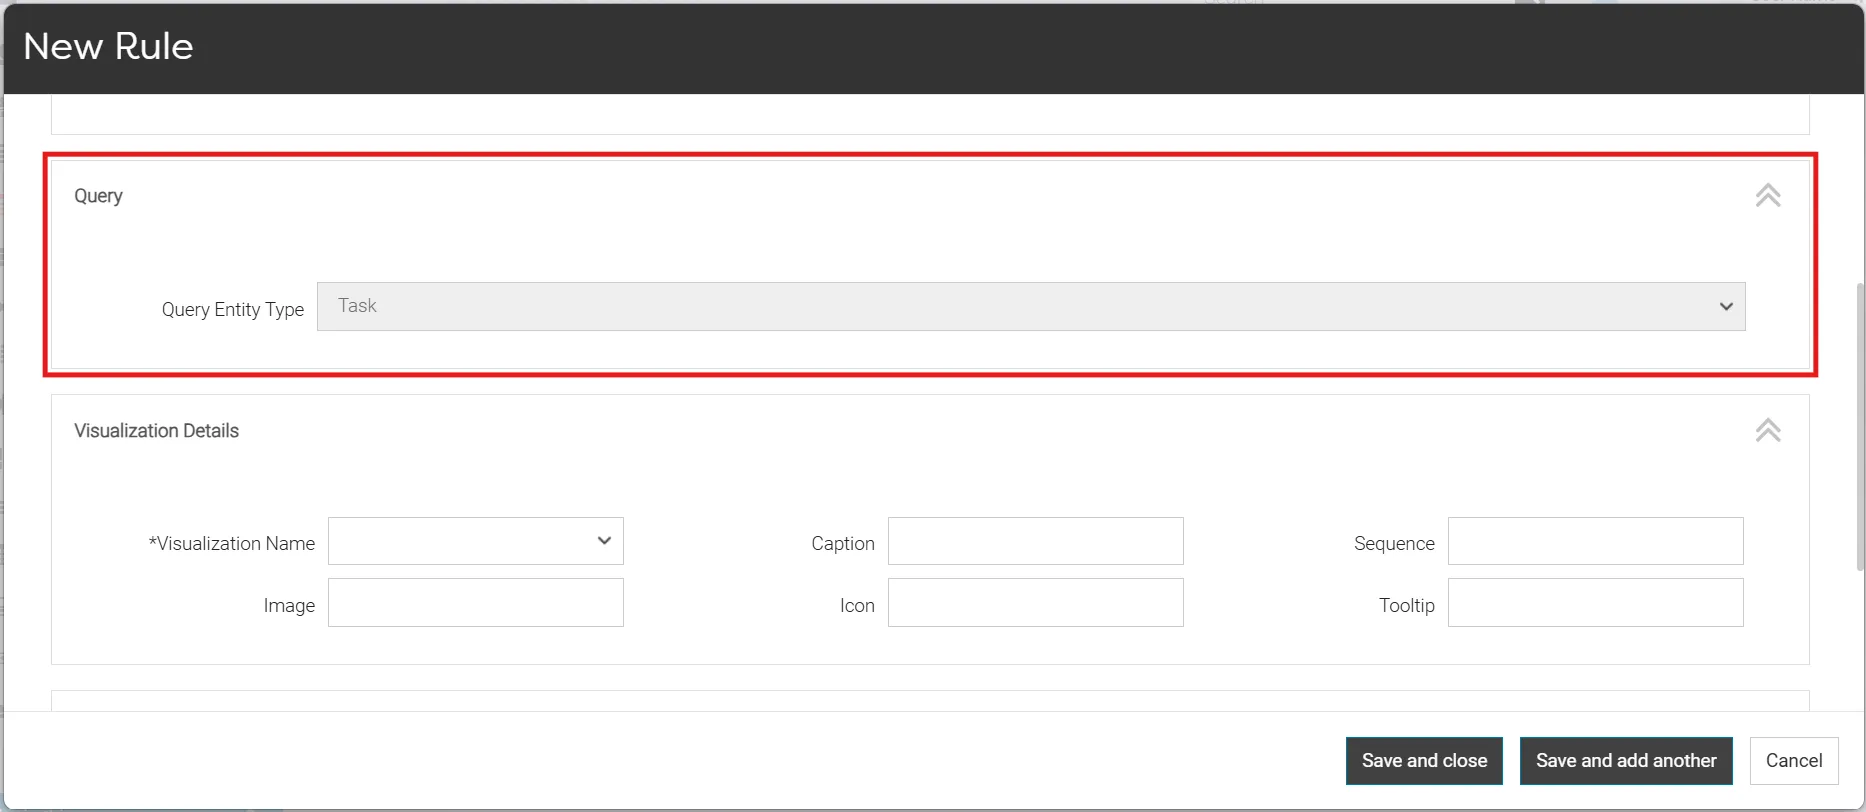
The Query section determines the entity to which the rule should be applied.
- Select the required Query Entity Type.
Note: Since the rule is navigated to from an entity type (for example, Case or Lead), the system automatically sets the Query Entity Type to that entity.
Visualization Details
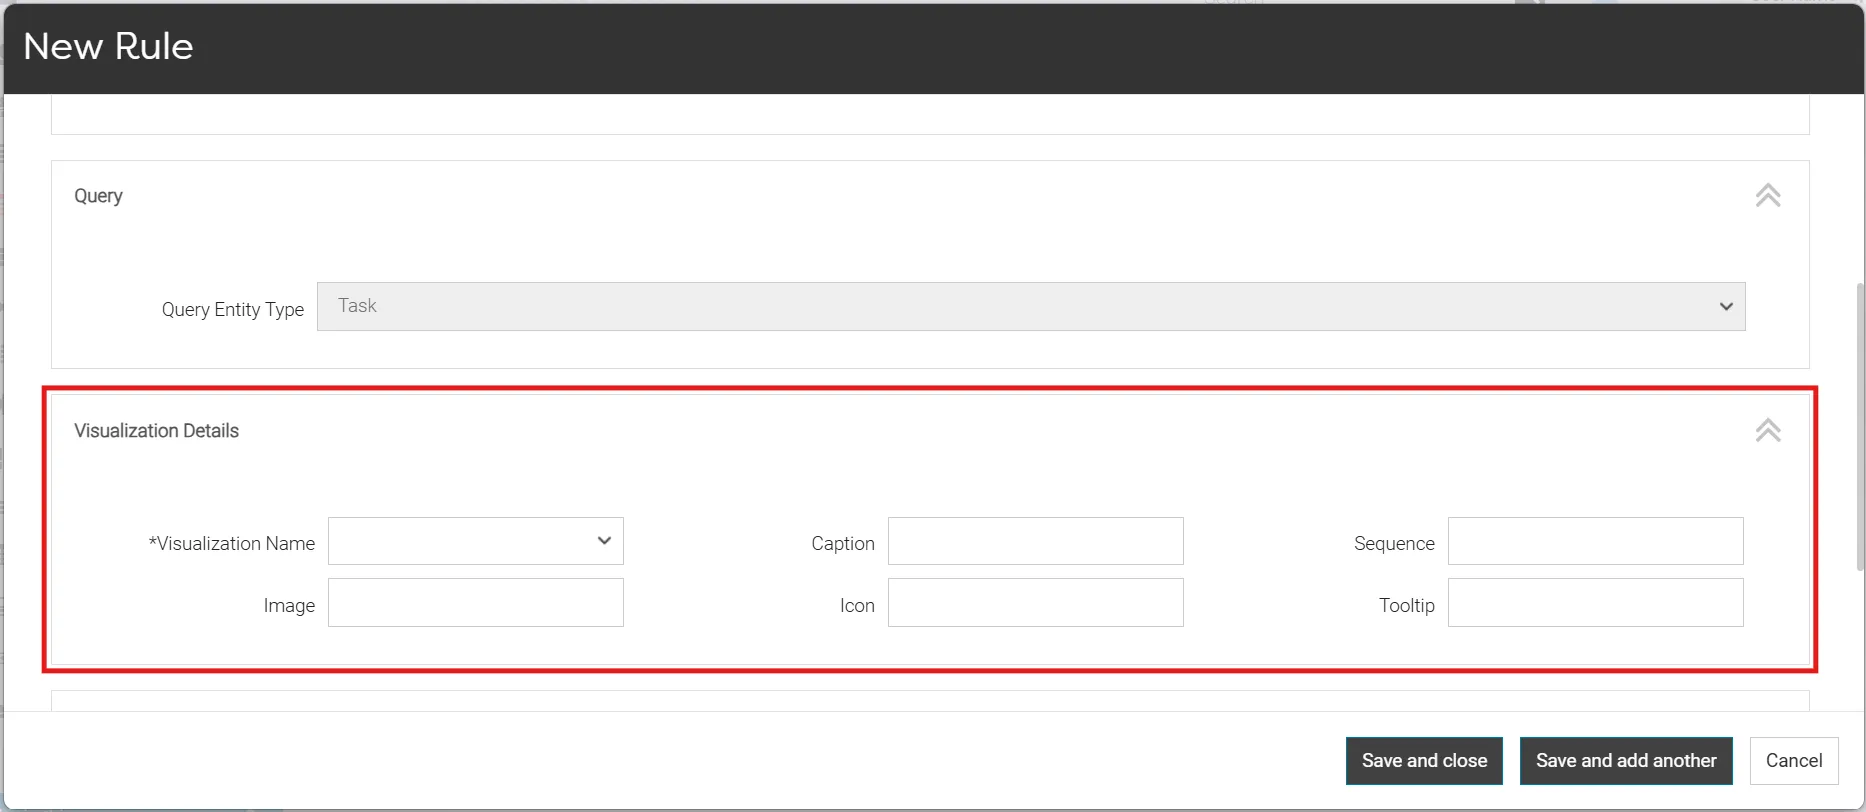
- Select your desired Visualization Name from the dropdown list (for example, Grid).
- Enter the name for the pagescape in the Caption field.
- Enter the sequence number in which the visualization will be displayed (for example, 1).
- Enter the required image name in the Image field.
Note: The image is used as the thumbnail for the visualization in the Visualization Switcher menu.
- Enter the required icon name in the Icon field.
Note: The icon is displayed for the visualization in the Visualization Switcher menu and is also displayed when the visualization is selected to view the entities.
- Enter the tip information in the ToolTip field.
Conditions
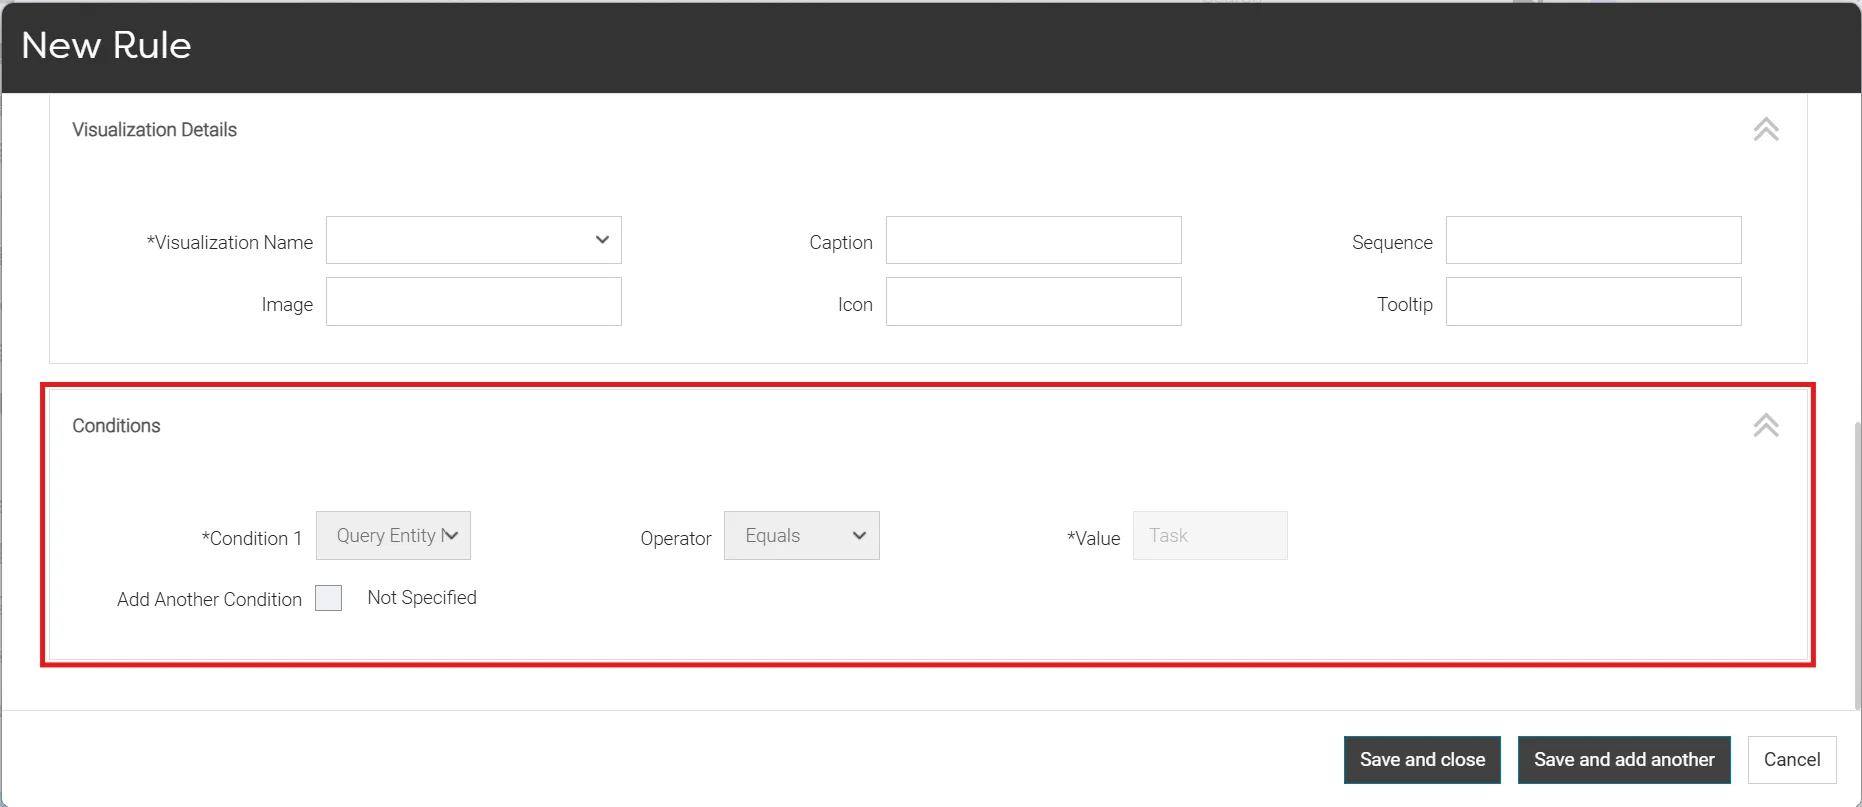
Note: When a rule is created from an entity page (for example, Case or Lead), the system automatically sets Condition 1 based on the entity type.
- Select Add Another Condition, to add another condition.
- Select the required condition from the Condition dropdown list.
- Select the required Operator.
- Enter the required Value.
- Repeat the process for each additional condition.
Save the Rule
- Review all the sections and the values you have entered.
- Click Save.
A validation error message is shown if the values are incorrect or required fields are missing. Once a form is saved successfully, it is listed on the Rules list page.
When the rule conditions are satisfied:
- The visualization created is available in the Visualization Switcher for the desired entity type.
The visualization is not available when:
- The entity type does not match the configured Query Entity Name.
- The rule is disabled by clearing the Is Enabled checkbox.
Example
The following example demonstrates how to create a custom Pagescape Rule to set a visualization for a desired entity type.
Scenario:
As an admin, you want to view Task entities in Grid Visualization with your desired icon, image (thumbnail), and caption. Follow the below steps:
Steps:
Section 1: Rule Info
- Navigate to the Rules page of the Task entity.
- Click the plus (+) icon.
- Enter a rule name in the Name field.
- Example: Grid Viz Tasks
- Enter a description in the Description field.
- Example: Displays the Tasks in Grid Viz.
- Select Pagescape from the Rule Type dropdown list.
- The Is Enabled checkbox is selected by default.
Note: If the checkbox is cleared before saving, the rule is created in a disabled state and is not executed or displayed in the platform until it is enabled.
- The Is Extended checkbox is selected by default and cannot be unchecked.
Section 2: Query
- In the Query Entity Type field, the Task entity is selected by default.
Note: Since the rule is created from the Rules page of the Task entity, the system automatically sets the Query Entity Type to Task.
Section 3: Visualization Details
- Select Grid from the Visualization Name dropdown list.
- Enter Task Grid in the Caption field.
- Enter 1 in the Sequence field.
- Enter the required value in the Image field.
- Enter the icon name in the Icon field.
- Enter the tip information in the ToolTip field.
- Example: Use to view tasks in grid viz.
Section 4: Conditions
Condition 1 (Selected by default)
- Condition 1 = Query Entity Name
- Operator = Equals
- Value = Task
Save the Rule
- Review the rule configurations.
- Click Save to save the rule.
Expected outcomes:
When the rule conditions are satisfied:
- The Grid visualization created is available in the Visualization Switcher menu for the Task entity type.
- The visualization is displayed with the configured Task Grid caption and the configured image as its thumbnail in the Visualization Switcher menu.
- The configured icon is displayed for the visualization when it is selected to view the Task entities in that visualization.
- Since the Sequence is set to 1, the Grid visualization appears first in the Visualization Switcher menu.